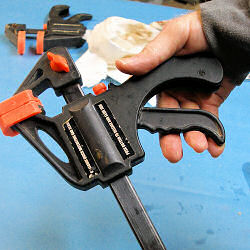
 It has happened to everyone. You are holding together a glue-up, you reach for your trusty one-handed quick-grip clamp, release the jaw, position the clamp and squeeze. Nothing! The trigger sticks or has no affect on the clamp. Words mumbled. Frustrated, you either toss the clamp or hang it back up, reaching for another — hoping it will function properly. Then a day, a week or month later — rinse and repeat.
Rarely, is the culprit clamp pedigree or excessive wear. More often than not, dirt or saw dust is preventing the mechanism from working as advertised.
Well, do not toss that clamp! There’s a hack for that.
Here, we demonstrate how to tune-up that clamp, using a few tools and some spray lubricant. Before you know it, that ‘do nothing’ clamp is back to work.

Disassemby
Time to take the clamp apart. Usually all that is required is to remove the main mechanism cover plate. Most clamp covers are held in place with screws, but others are pinned. Removal of the branding decal may be required.

Remove the Cover
Using a straight-slot screwdriver or narrow putty knife, pry the cover off the mechanism. You need only start the process. The cover should pop off easily.

Remove the Trigger
Noting the orientation of the trigger to the springs in the mechanism, remove the trigger and alignment pin.

Remove Debris
Using a clean paint brush, remove any debris from the spring mechanism. Follow up by blasting with compressed air — either using a compressor or bottled air. Avoid using a vacuum — as it may suck the springs out of the trigger housing.

Cleaning
Using synthetic steel wool (dampened with mineral spirits) remove any rust, dirt, dust or roughness from the shaft. Sandpaper (220 grit) will work as well, just wipe down the surface when finished.

Lubricate
Spray lubricate on the shaft and the spring mechanism. WD-40 is a good choice, but other product options are available. Only a light coating is desired. Work the lube into the shaft with a cloth.

Reinstall the trigger
Based on your earlier observation of how the the trigger was oriented to the springs, replace the trigger and the alignment pin.

Replace the Cover
Reassemble. Reinstall the clamp cover and any other parts removed during the cleaning process.

Spread the Lube
Release the pressure on the spring mechanism and move the it back and forth on the shaft to ensure the lube is evenly distributed.

Wrapping it Up
Ratchet the mechanism into the full-on clamped position. Squeeze! Your clamp should now have the same holding power as when it was new.


